Fix Blurry & Soft Photos Instantly
Sharpen blurry, soft, or out-of-focus photos with one click.
How it works
Drag & drop or browse. Stays on your device.
Instant quality analysis with specific issues.
One click corrects every detected issue.
Export at full resolution.
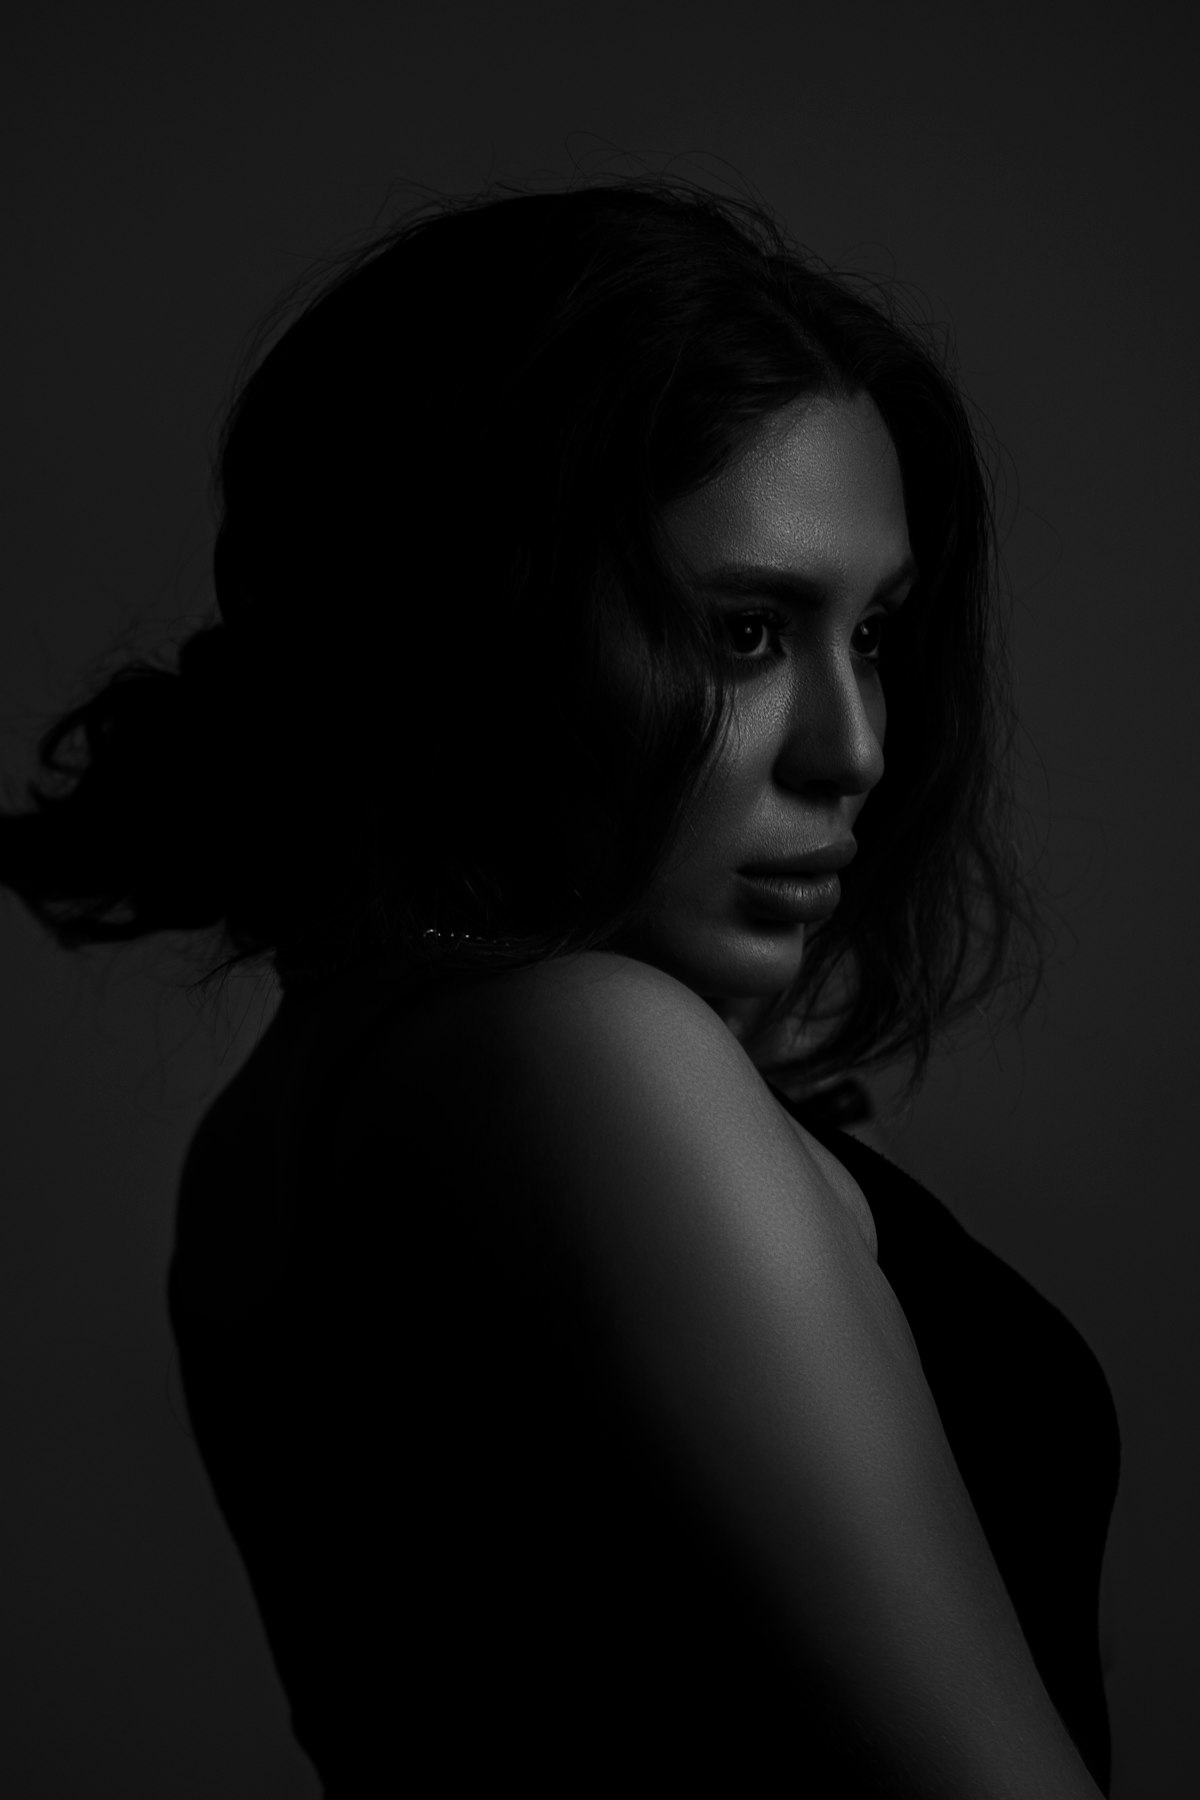
You nailed the moment, but when you zoomed in, your photo looked soft. The focus missed by just a hair, or your camera chose the background instead of your subject’s eyes.
It happens to everyone. But before you delete that shot, let’s see if we can bring it back.
Understanding What “Blurry” Really Means
Not all blur is the same, and that matters when you’re trying to fix it.
Soft focus happens when your camera almost got it right. The autofocus landed just behind or in front of your subject, creating that slightly dreamy, not-quite-sharp look. This is the most common issue with portraits, especially in lower light when cameras struggle to lock focus.
Motion blur is different. That’s when your subject moved, or your hand shook during the exposure. You’ll see streaking or ghosting instead of just softness.
Here’s the truth: you can rescue soft photos. Motion blur? That’s much harder. If your subject’s face is streaked across the frame, no amount of sharpening will reconstruct the detail that was never captured.
Why Your Portrait Looks Soft
Modern phone cameras and DSLRs are incredible, but they’re not perfect. Here’s what usually goes wrong:
Missed autofocus is the number one culprit. Your camera focused on your subject’s ear instead of their eye. Or it locked onto the shirt instead of the face. In portraits, even an inch of missed focus creates that frustrating softness.
Low light forces compromise. Your camera opened the aperture wide to gather more light, which shrinks the depth of field. Now only a sliver of your frame is actually sharp, and your subject’s face might be just outside that zone.
Lens quality matters more than you think. Budget lenses or older phone cameras often produce softer images, especially at the edges. Even with perfect focus, the image lacks that crisp, defined look.
Digital noise reduction can also steal sharpness. When you shoot in dim conditions, your camera applies noise reduction that smooths away detail along with the grain. You can learn more about fixing this in our guide on fixing grainy photos.
How PhotoInput Sharpens Soft Photos
Our tool uses adaptive edge enhancement to bring back definition without creating that over-sharpened, artificial look.
When you upload your photo, we analyze the actual content. Faces get treated differently than backgrounds. Edges receive targeted sharpening while smooth areas like skin stay natural.
The key adjustment is intelligent sharpness. We enhance edge contrast selectively, bringing out detail in eyes, hair, and facial features without amplifying noise or creating halos. For your soft portrait, we applied +0.25 sharpness along with supporting adjustments to exposure, contrast, and shadows.
This isn’t just cranking up a sharpness slider. We’re also optimizing contrast, lifting shadows to reveal hidden detail, and fine-tuning exposure so your newly-sharpened image doesn’t look flat.
Everything happens in your browser using your device’s GPU. Your photo never uploads to a server. It never leaves your computer. You get professional-level sharpening with complete privacy.
When Sharpening Can’t Help
Let’s be realistic. Some blur can’t be fixed.
Heavy motion blur with visible streaking can’t be reversed. If your subject moved significantly during exposure, the detail is permanently smeared across multiple pixels. Sharpening will just make the blur more obvious.
Completely out-of-focus photos where nothing is sharp are also tough cases. If every part of your image is equally blurry, there’s no edge information to enhance. The detail simply wasn’t captured.
Severe camera shake that affects the entire frame usually can’t be rescued. When everything is displaced in the same direction, you’re looking at the limits of what software can do.
But soft focus? Slightly missed autofocus? That gentle lack of crispness in portraits? Those we can absolutely improve.
The Quick Fix Approach
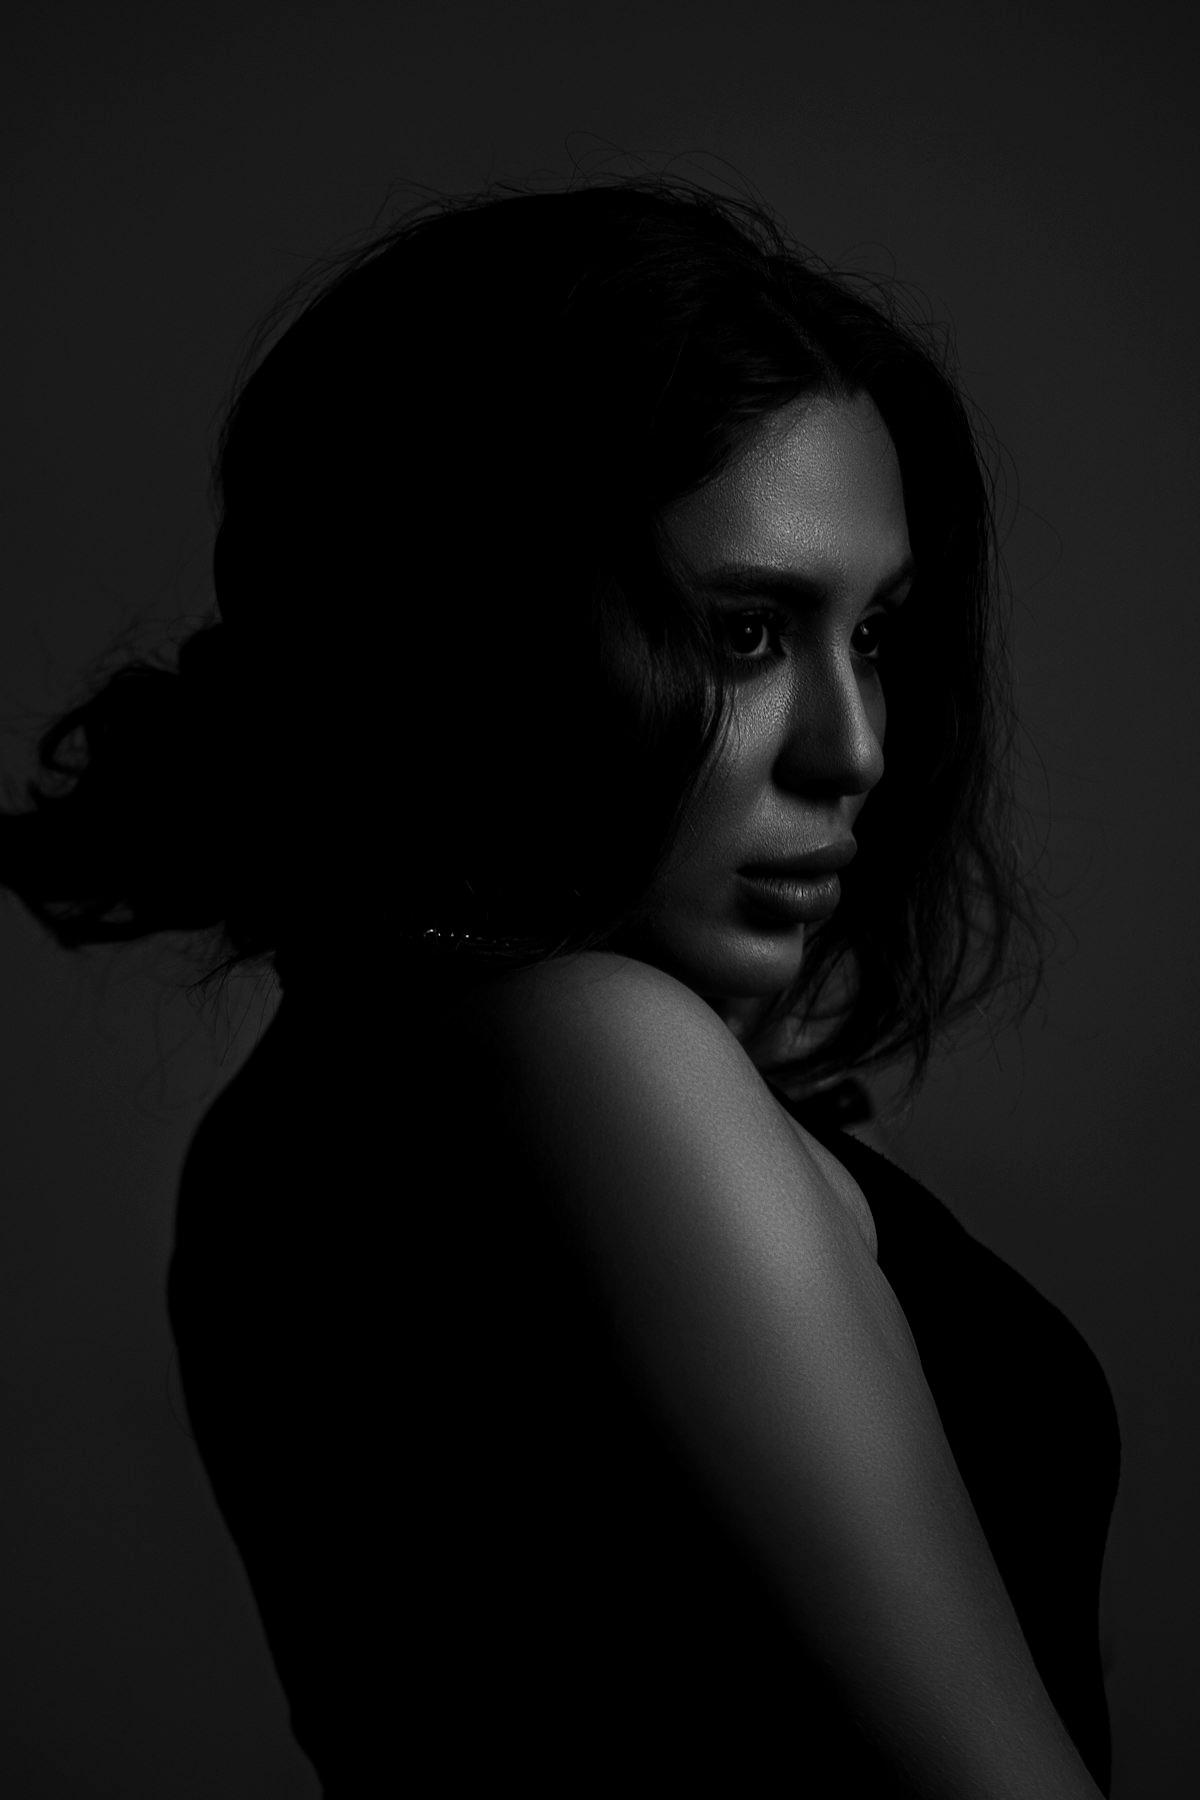
Upload your soft photo and click “Fix Everything.” Our analysis detects the softness and applies the right combination of sharpness, contrast, and tonal adjustments.
You’ll see the difference immediately in the before/after comparison. Eyes gain definition. Hair shows individual strands instead of fuzzy masses. Facial features pop without looking artificial.
If you want more control, switch to the Adjust tab. The sharpness slider lets you dial in exactly how much edge enhancement you want. Pair it with contrast to make the improvement even more dramatic, or adjust clarity for midtone definition.
For photos that are both soft and lack punch, you might also want to address low contrast separately to get the full transformation.
Beyond Sharpening: Supporting Adjustments
Sharpness alone isn’t always enough. The supporting adjustments matter.
Contrast enhancement makes sharpening more effective. When you increase contrast, edges become more defined naturally. The sharpness adjustment has more to work with.
Shadow lifting reveals detail that was hiding in darker areas. For portraits, this often means bringing out definition in hair or clothing that was falling into shadow.
Slight exposure increase can help if your photo is underexposed. Sharpening dark, muddy areas amplifies noise. Brighten first, then sharpen.
Temperature adjustment doesn’t affect sharpness directly, but it helps the overall image feel more polished. A slightly cooler tone often makes portraits feel crisper and more modern.
Our tool applies these automatically when you hit “Fix Everything,” but you can fine-tune each one individually if you want a specific look.
Common Mistakes When Sharpening
Over-sharpening is the biggest amateur mistake. If you push sharpness too far, you’ll see bright halos around edges, amplified noise in smooth areas, and an artificial, over-processed look. Skin especially suffers from excessive sharpening.
Ignoring noise is another problem. If your photo is both soft and grainy, you need to balance sharpening with noise management. Pure sharpening will make every speck of grain razor-sharp, which looks terrible.
Sharpening the whole image equally treats backgrounds the same as your subject’s face. Professional sharpening is selective, but most basic tools apply the same amount everywhere.
Forgetting about contrast. Sharpness without contrast looks flat. Contrast without sharpness looks muddy. They work together.
PhotoInput handles these nuances automatically, but if you’re manually adjusting, keep these principles in mind.
What Makes a Photo Look Sharp
Sharpness isn’t just about focus. It’s a perception created by multiple factors working together.
Edge contrast is the primary driver. When light pixels sit directly next to dark pixels with a clean transition, we perceive sharpness. Blur means that transition happens gradually over multiple pixels.
Acutance refers to how quickly that transition occurs. Higher acutance means a faster, more abrupt edge transition, which looks sharper even if the actual detail is similar.
Local contrast in midtones creates the impression of three-dimensional depth and clarity. This is why the clarity slider in most editors affects perceived sharpness without being a traditional sharpening tool.
Noise and texture can actually contribute to sharpness perception when they’re fine-grained. Completely smooth areas can look soft even when they’re technically sharp. This is why aggressive noise reduction often makes photos look less crisp.
Understanding these factors helps you make better decisions when editing. Sometimes boosting contrast does more than sharpening alone.
Your Photo, Your Device, Your Privacy
We built PhotoInput because existing photo tools either compromise your privacy or cost money for basic fixes.
When you upload a photo here, it stays on your device. All processing happens in your browser using WebGL2 shaders running on your GPU. We never see your photo. We can’t see your photo. There’s no server receiving your image.
This isn’t just a privacy feature. It’s also faster. No upload wait, no processing queue, no download delay. The fix happens instantly, locally, on your hardware.
And it’s completely free. No watermarks, no subscriptions, no trial limitations. Fix one photo or a thousand. We don’t track, count, or care.
Frequently Asked Questions
Can you completely fix a blurry photo?
It depends on the type of blur. Soft focus and slight out-of-focus issues can be significantly improved through intelligent sharpening and contrast enhancement. Motion blur and severe focus problems are much harder to fix because the detail was never captured in the first place. Upload your photo to see how much improvement is possible.
What’s the difference between blur and soft focus?
Soft focus means the image is slightly out of focus but still has some edge definition. Blur usually refers to motion blur from camera shake or subject movement, which smears detail across multiple pixels. Soft focus can often be rescued with sharpening. Motion blur is much more difficult to fix.
Why does sharpening make my photo look worse?
Over-sharpening creates bright halos around edges, amplifies noise, and makes skin look artificial. The key is subtle, selective sharpening that enhances edges without introducing artifacts. PhotoInput’s automatic sharpening is calibrated to avoid these issues while still improving perceived sharpness.
Can I sharpen photos on my phone?
Yes. PhotoInput works in any modern browser on phones, tablets, and computers. All processing happens locally using your device’s GPU, so it works on mobile devices just as well as desktops.
Will sharpening work on old photos?
Yes, but old scanned photos often have both softness and grain. You may need to balance sharpening with noise management. For heavily grainy photos, check our guide on reducing grain first, then apply sharpening afterward.
How much sharpening is too much?
If you see bright halos around dark edges, artificial texture in smooth areas like skin, or amplified noise, you’ve gone too far. Natural-looking sharpening should enhance existing detail without creating new artifacts. When in doubt, use our automatic “Fix Everything” option, which applies carefully calibrated adjustments.
Does sharpening work on photos taken with phone cameras?
Absolutely. Phone cameras often produce slightly soft images, especially in lower light or when using portrait mode. Sharpening combined with contrast and exposure adjustments can significantly improve phone photos.
Are my photos really private?
Yes. PhotoInput processes everything locally in your browser using WebGL2. Your photos never upload to any server. You can verify this by opening your browser’s network tab and watching the upload — there is none. Your images stay completely private on your device.